Enhanced Functionality with Multi-Material 3D Printing
Multi-material 3D printing opens up new possibilities in creating functional or aesthetic prints that can perform different functions directly from the printing process with no further processing or alterations needed. In this post we discuss just one simple example of how flexible and rigid filaments came together.
The Idea
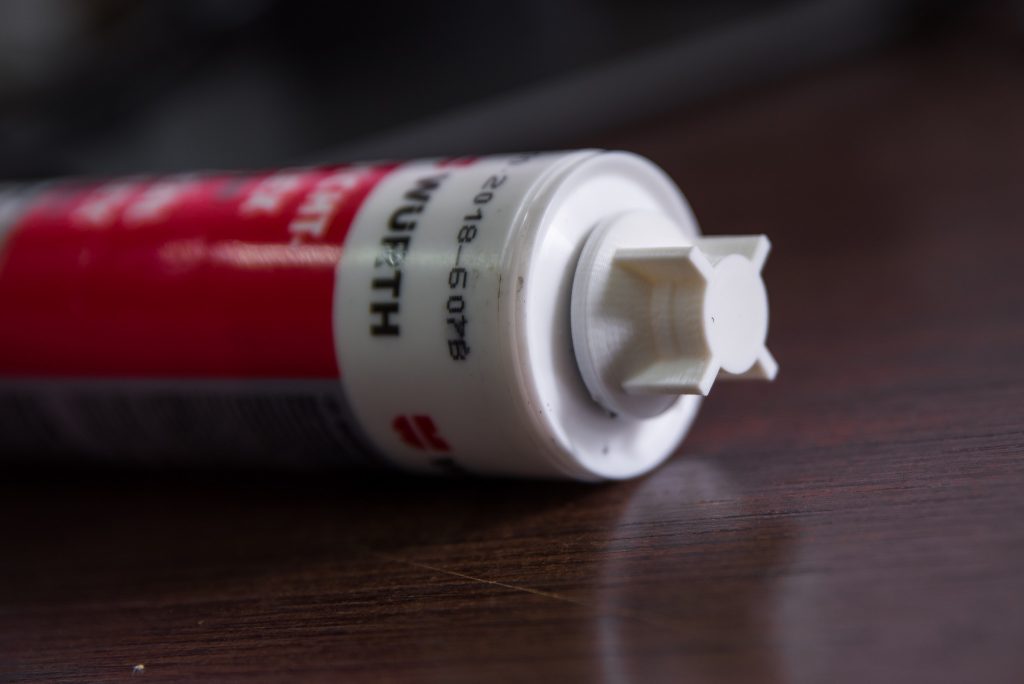
We recently came across “The Sealant Cartridge Nozzle Cap that Works” by “The-Mechanic” on thingiverse.com (Figure 1).
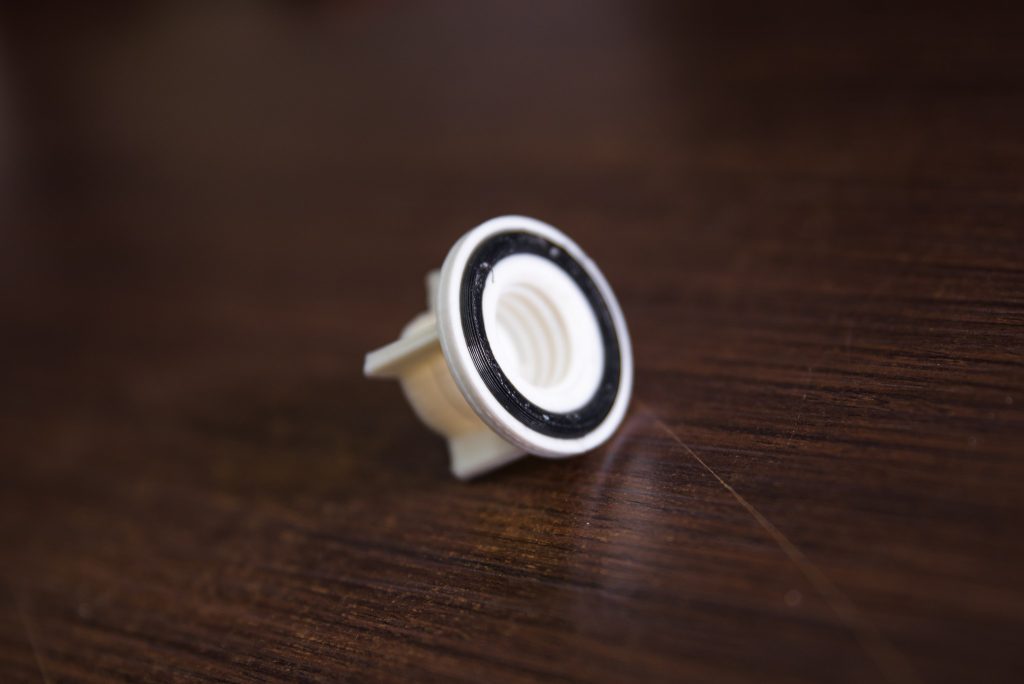
Given that we have a few half-used sealant cartridges sealed with laboratory gloves and rubber bands, we wanted to give this print a go. So we quickly printed a couple of these and went to the parts bin for some O-rings. Luck had it that we were out of the specific O-ring required for this cap to function, so we opted to print it instead. No need to run out to the shops to buy an O-ring when you have the perfect excuse to use dual extrusion and flexible filament?
By using dual extrusion, the O-ring can be printed in place and is thus permanently attached to the print, this means that there is no chance of it getting lost. Given that O-rings are also quite difficult to print on their own without supports, by printing them in place no supports are needed.
The Design
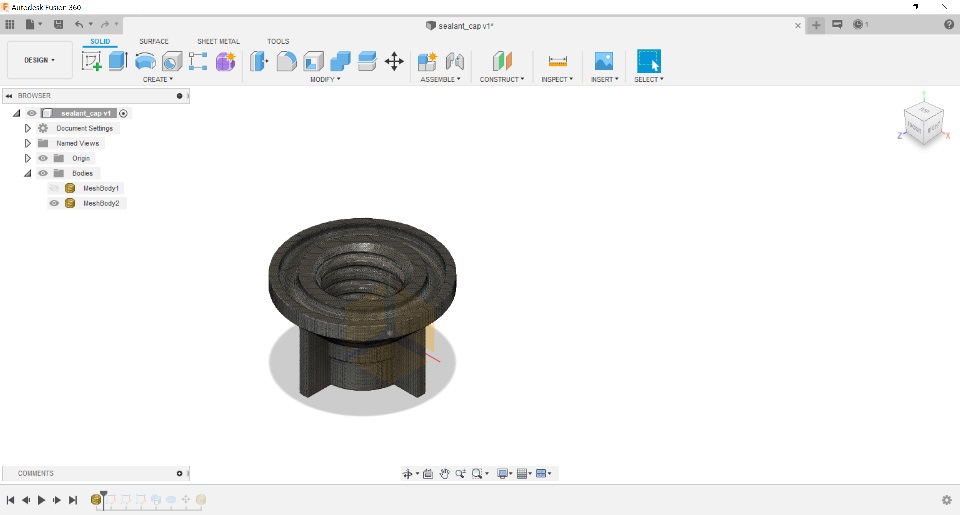
So, Edward, our co-founder and resident engineer, opened up Fusion360 and inserted the cap STL file as a mesh (Figure 2). From there he created a mesh section sketch to get the outer and inner diameters needed for the design of the O-ring. After trying to design the O-ring with the sweep command, the torus function turned out to be ideal for such a design. The two designs were placed and the fit tested (Figure 3). After this all that was needed was to export the files; the cap, and the O-ring, and then figure out a way of how to get them to align and print as a Multi-material print in the slicing software.

Preparing for Multi-Material 3D Printing
It turns out using the Ultimaker Cura makes multimaterial 3D prints really easy. Once you import the files into the slicing software, in our case Cura 4.2, you have to setup the slicer for dual extrusion printing. In the case of Cura 4.2 you first import both models, after which you assign the specific hot-end each part will be printed with and setup the materials and settings (Figure 4).
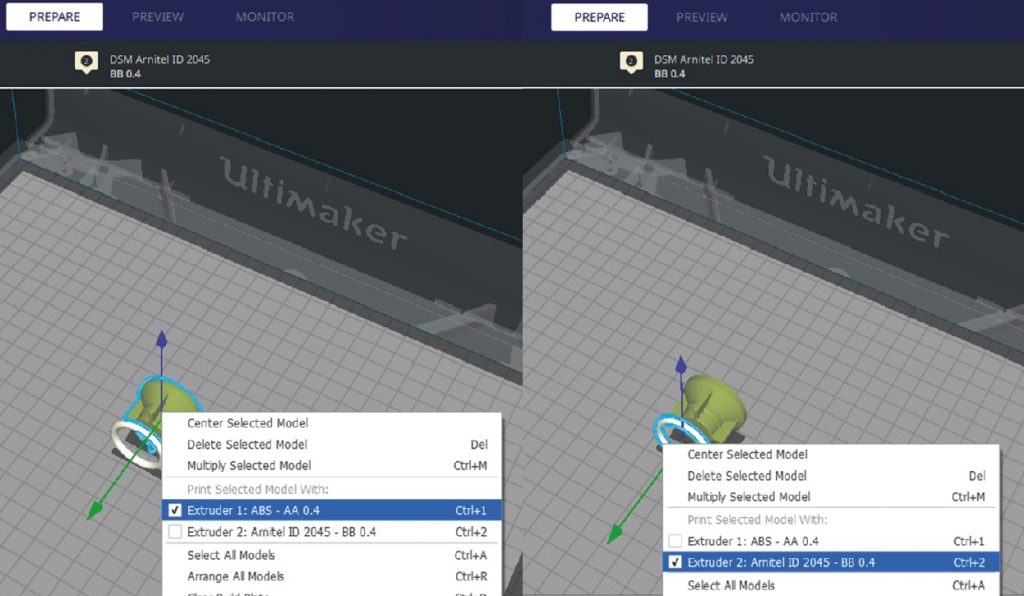
In our case we loaded the Ultimaker S5 with white Polymaker ABS for the cap body on the left extruder and black DSM Arnitel® ID2045 for the O-ring on the right extruder. ABS should be more than strong enough to withstand tightening without breaking, while Arnitel® ID2045 is one of the softer flexible filaments, thus a good candidate for an O-ring which is generally made of rubber and should deform enough to create the airtight seal that we are after.
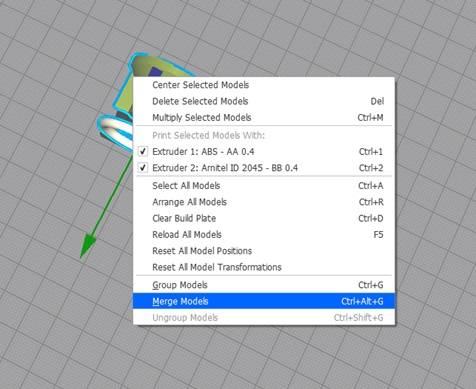
Following material selection one can select both bodies, right click and select merge (Figure 5). This, merges both bodies together into a single dual extrusion print with the correct alignment that was previously given to the parts. The print was then oriented with the top side of the cap touching the build-plate and printed.
The Resulting Multi-material 3D Print
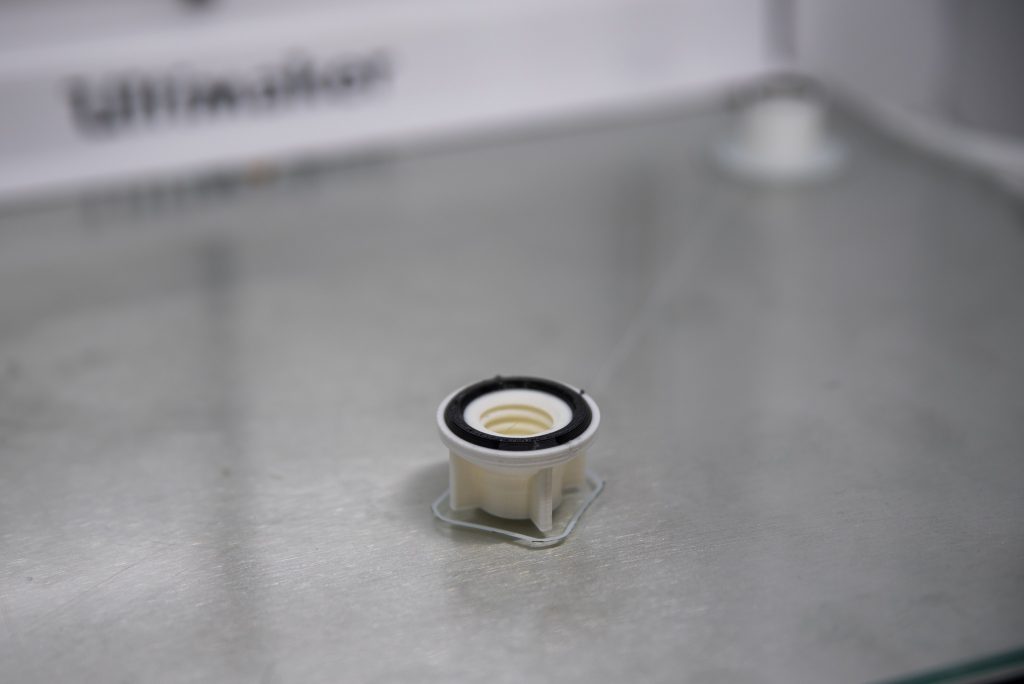
In just over an hour we had our sealant cartridge cap with O-ring integrated ready for action! The resulting print works quite well, and even though the printed O-ring is still noticeably harder than a regular rubber O-ring, it still forms a good seal with the sealer cartridge body.