Stronger 3D Printed Parts – Useful Tips
Stronger 3D printed parts
FDM 3D printing opens up a world of possibilities, from crafting intricate designs, rapid generation of prototypes to realizing functional components. As makers, we all strive for not just aesthetically perfect prints but also for robust, resilient and stronger 3D printed parts which can withstand their intended use.
In this article, we’ll delve into some invaluable tips that can transform your 3D prints from mere plastic structures to strong, durable parts. Whether you’re a beginner seeking foundational knowledge or an experienced maker refining your craft, these insights will help you in producing 3D printed parts that not only look impressive but stand up to the test of strength and functionality.
Optimize Print Orientation
This is by far the most important consideration when it comes to 3D printing. In the case of most materials the resulting print is anisotropic. This essentially means that the strength of the printed part is not the same for all directions. Since FDM printing relies on depositing material layer by layer the strength of the part in the build (Z) direction is dependent on the bonding between the layers rather than the intrinsic material properties. CNC kitchen shows this fact very clearly where in the Z-direction most materials show about 30%-50% of the strength when compared to the X-Y direction.

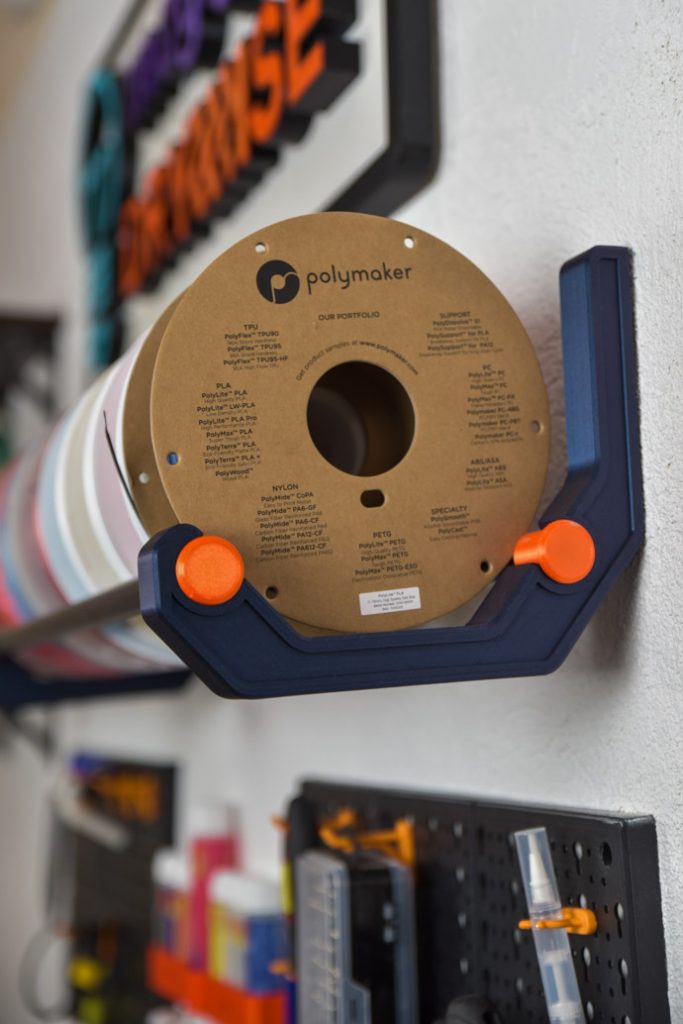
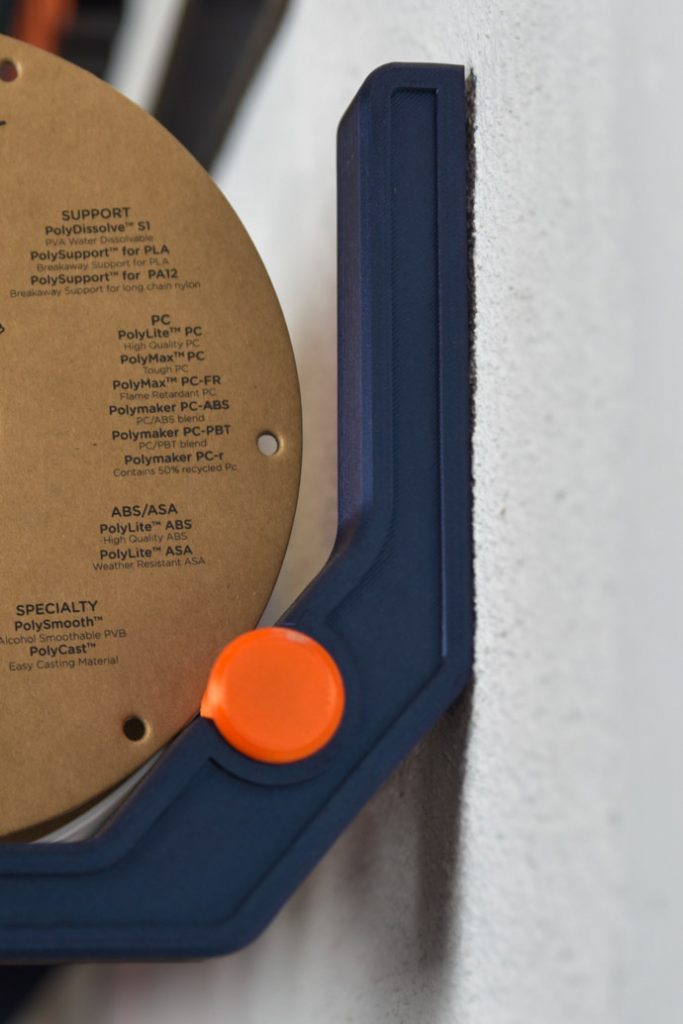
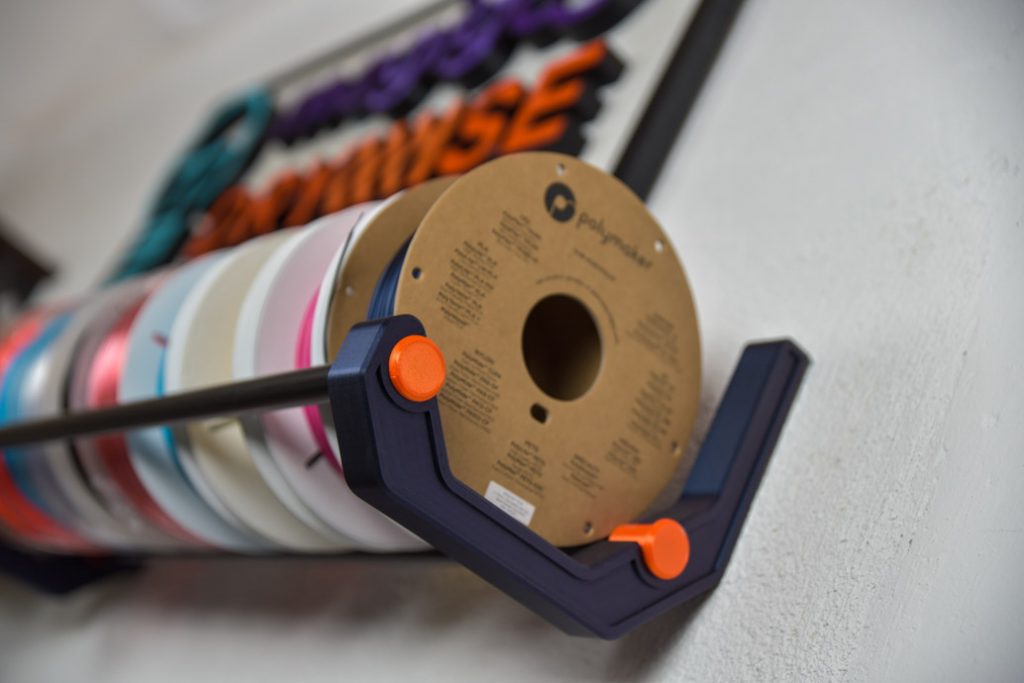
With this knowledge you should carefully consider the orientation of your 3D printed parts on the build plate. Orient critical stress points along the build layers to enhance overall strength. Looking at a practical example of a filament spool wall holder, it should be printed with the side face touching the build-plate rather than the bottom part facing the build-plate. This gives the bracket a much higher overall strength albeit at the cost of the model requiring supports.
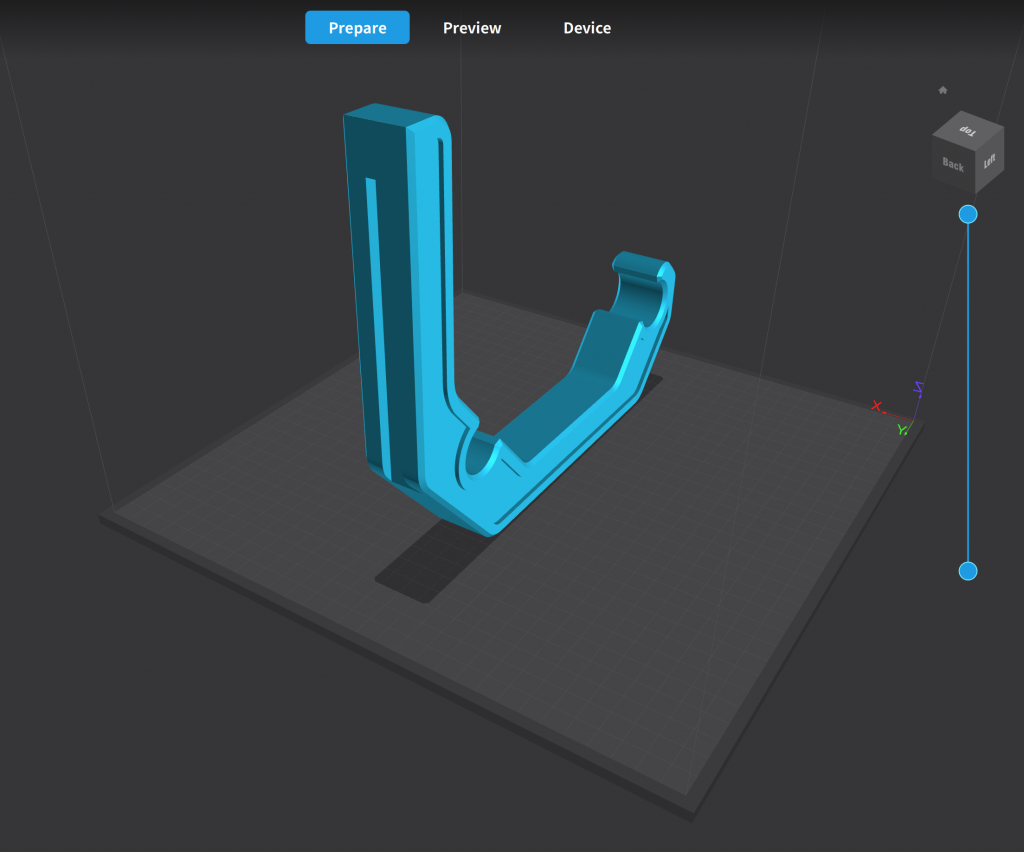
Printing the shelf bracket in this orientation will avoid the need for support structures, but, it will result in a weaker part which might fail when loaded. 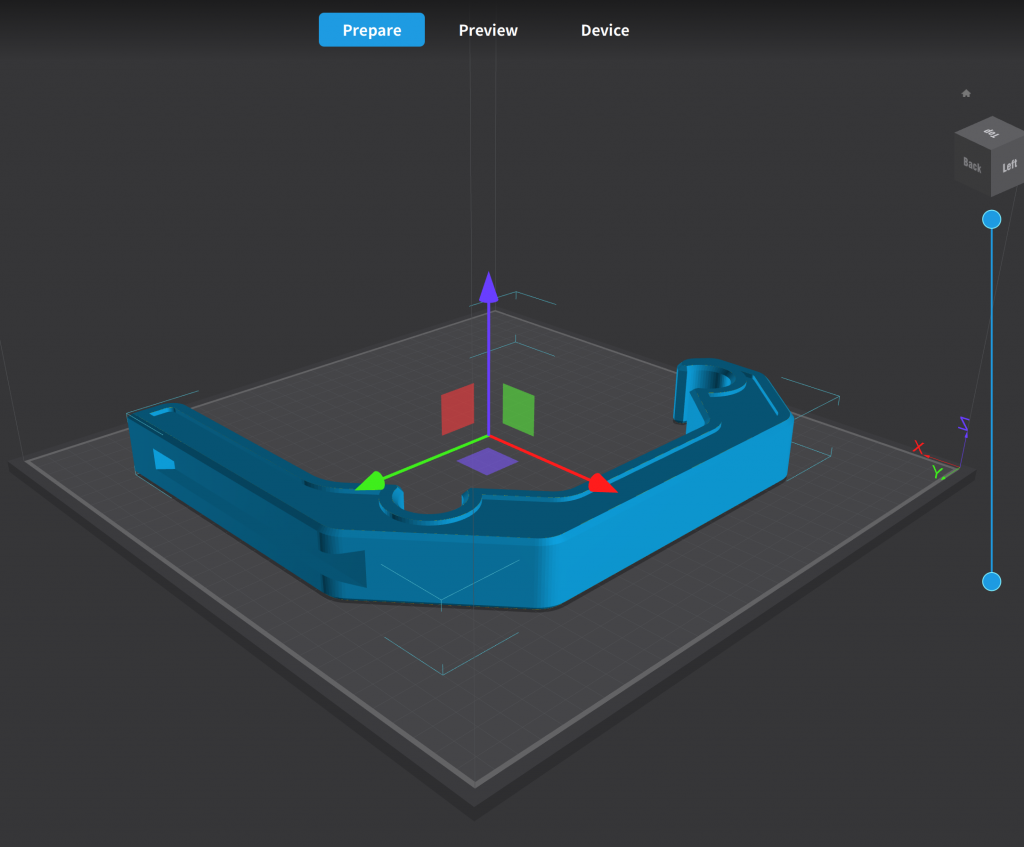
Laying the shelf bracket on its side will maximise part strength as the shelf bracket is now loaded along the layer lines
Furthermore you should avoid overhangs and unsupported features at load bearing sections of your parts that can compromise the structural integrity of the print.
Improve Layer Adhesion
Following the point above, if your part still needs to be loaded in the build direction one way to improve the strength of the part is to improve layer adhesion. The table below gives a rough indication on what settings affect layer adhesion and why. Use this data to improve the layer adhesion and print strong parts.
| Parameter | Effect | Why |
|---|---|---|
| Printer Enclosure | A printer enclosure improves layer adhesion | Enclosed printers tend to retain more temperature and block drafts which improves layer to layer bonding |
| Nozzle Temperature | Higher nozzle temperatures lead to stronger layer adhesion | The higher nozzle temperature improves the strength of the bond of the newly formed layer on the previous layer |
| Bed Temperature | Higher bed temperatures lead to stronger layer adhesion | Higher bed temperatures lead to a higher chamber temperature which improves layer to layer bonding |
| Chamber Temperature | Higher chamber temperatures lead to stronger layer adhesion | Higher chamber temperature improves layer to layer bonding |
| Cooling fan | The use of a cooling fan leads to a weaker layer adhesion | The cooling fan tends to cool previous layers to improve the quality of overhangs at the expense of layer bonding |
| Print Speed | Higher print speeds lead to a weaker layer adhesion | Printing at higher speeds means that there is less time for the material to melt and fuse with the previous layer |
| Line width | A thicker line width leads to a stronger layer adhesion | Thicker line widths reduce the amount of voids within the part thus improving layer to layer bonding |
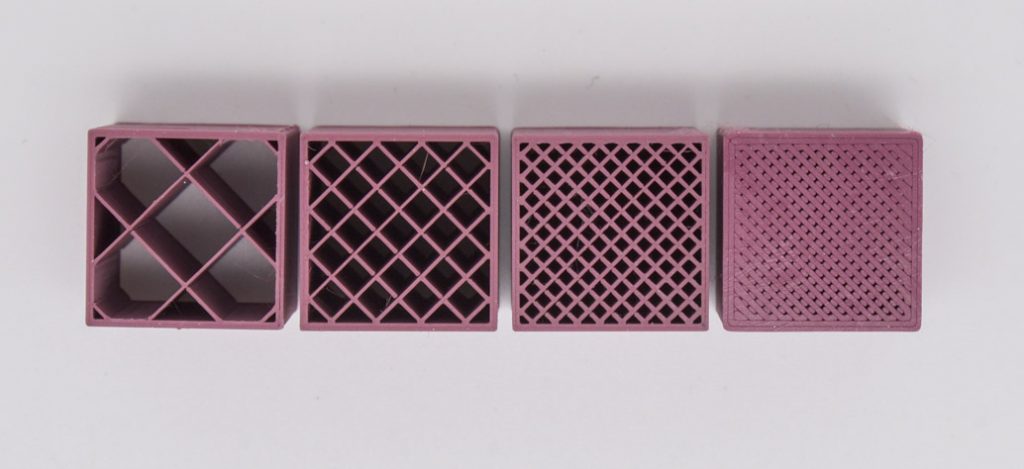
Choose the Right Shell Thickness Infill Percentage and Pattern
The infill refers to the internal structure of the print, and it significantly affects the strength of the part. Increase the infill percentage for greater solidity and improved impact resistance, and choose patterns like honeycomb or gyroid that distribute stress more evenly throughout the print. Experiment with infill settings to find the right balance between strength and material usage. Typically values above 60-70% infill do not increase the part strength by much.
Nonetheless, the shell thickness of a part has an even more significant effect of the strength as the stresses in a part are usually distributed along its surface. Increasing the shell thickness from the default value can have a very significant increase on the strength and stiffness of a printed part.

Choose the correct material for stronger 3D printed parts
The choice of material greatly influences the strength of your prints and also greatly depends on the application of the printed parts. The table below gives some examples of what each material is suited for and not suited for. For a more in depth discussion on material choice read our previous article on choosing the right 3D printing material.
| Material | Most suited for | Not Suited for |
|---|---|---|
| PLA | Aesthetic parts, jigs and fixtures with static loads, prototypes, dimensionally accurate parts | High wearing parts such as gears, parts with dynamic loads, parts requiring high flexure, parts use in applications above 45 °C |
| ABS | Functional prototypes, parts requiring moderate heat resistance (80 C) and impact resistance | Parts exposed to UV, parts requiring high stiffness. |
| PET-G | Functional prototypes, watertight parts, parts requiring high transparency | Exposure to temperatures higher than 60 °C |
| Nylon | Functional prototypes, chemical resistant parts, high wear application | Parts requiring high stiffness |
| TPU | High impact resistance, flexible parts, living hinges | Parts requiring high stiffness |
| PP | High impact resistance, flexible parts, chemical resistance, living hinges | Parts requiring high stiffness |
| PC | High strength, impact resistance and toughness, High temperature resistance (100- 140 °C) | Flexible pats, living hinges |
Using different materials will expand your 3D printing knowledge and applicability. Experiment with different filaments to find the one that best suits your application.
Dry your material before you print
The importance of drying your material before printing is often overlooked especially when it comes to the effect this can have on the strength of 3D printed parts. If the filament absorbs moisture before the printing process, it can significantly impact the mechanical properties of the printed parts, affecting both surface finish and dimensional accuracy.
As the wet filament is heated during printing, water molecules within the material turn into vapor, creating voids that weaken the structural integrity of the part. The presence of moisture can also impede filament extrusion, causing additional challenges. When the filament passes through the 3D printer’s hot end, absorbed moisture can quickly transform into steam, disrupting the flow of molten filament. This disruption results in inconsistent extrusion and uneven layer deposition, ultimately leading to poor layer adhesion in the final printed parts. Therefore, managing and preventing moisture in filament is crucial for achieving optimal 3D printing results.
Post-Processing Techniques
Post-processing can strengthen your 3D printed parts. Techniques like annealing (for certain materials like PLA) or reinforcing with additional materials (such as epoxy resin or fiberglass) can significantly improve the overall strength and durability of the printed object. This excellent article discusses various post processing techniques which can be applied to your prints to improve strength and other properties.
Remember, producing stronger 3D printed parts is a combination of selecting the right settings, materials, and post-processing techniques. Regularly test and iterate your prints, making adjustments as needed to achieve the optimal balance between strength, functionality, and print quality.