DIY UV Curing Chamber
What is a Curing Chamber?
While FDM 3D Printing is possibly the most known and used additive manufacturing technology, one of the newest machines in the Magigoo offices is the Peopoly Phenom 3D Printer. This printer is an MSLA (Masked StereoLitography Apparatus), in which layer by layer, a photosensitive resin is cured and solidified in place.

The resin that we use here is the one recommended by Peopoly – Deft Resin. As with most resins that are used in SLA and MSLA printing, it is imperative to post cure them. This is done because while a resin print has finished and its final shape has been printed, the polymerisation reaction has not been fully completed. This is called the ‘green state’ of a resin print, and in this state, the material has not yet reached it’s potential mechanical properties. This full polymerisation is achieved through a Post Curing process.
Post Curing is typically done by exposing them to UV for a specific period of time. This can be done by leaving the part submerged in water in direct sunlight, however this is not always reliable and cannot be controlled.
As per the Deft Resin User Guide, this resin requires a post curing through exposure to UV with wavelength 395 – 405 nm for around 1 – 2 minutes, typically in a chamber of sorts.
Our DIY UV Curing Chamber
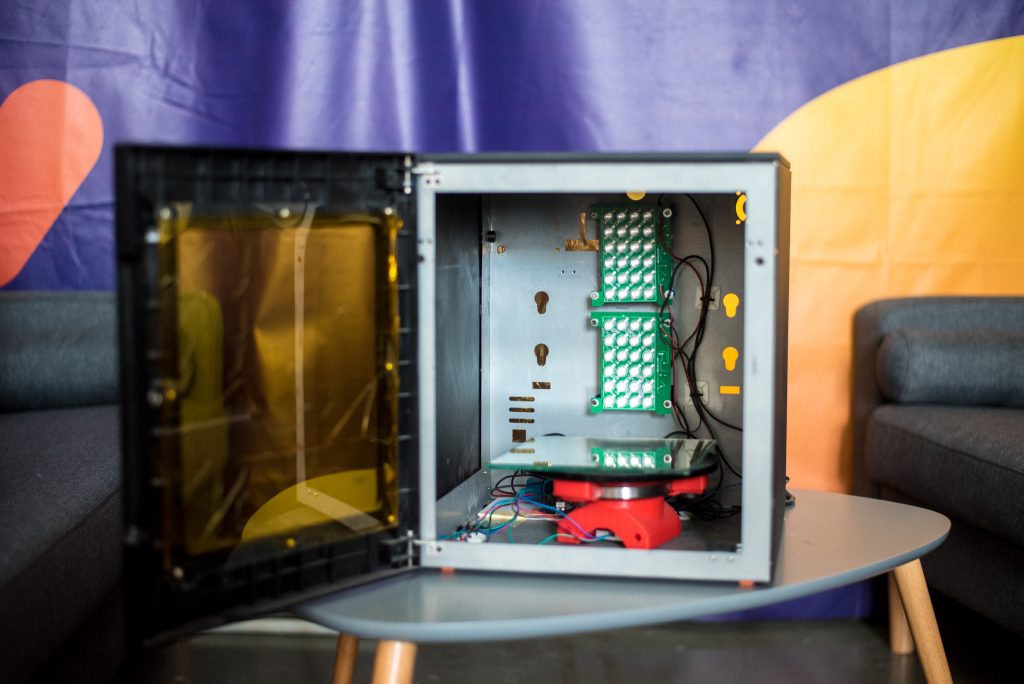
When this need for a curing chamber arose, the team started working on developing a DIY curing chamber. To do this, we needed to figure out what can be used as the housing, as well as procure a UV source. We also needed to ensure a complete exposure, and that as much of the part as possible will get cured. This is how we created our DIY UV Curing Chamber.
The Housing and UV Lights
For the housing, a retired Solidoodle 3D printer was used. This Solidoodle was one of the first 3D printers here at Magigoo, alongside a RepRap and two Wanhao Duplicator 4x’s. Rather than throwing this old 3D printer away, the team decided to dismantle all the components from the inside. This allowed us to use the sturdy metal shell as suitable housing for the curing chamber for our SLA prints.

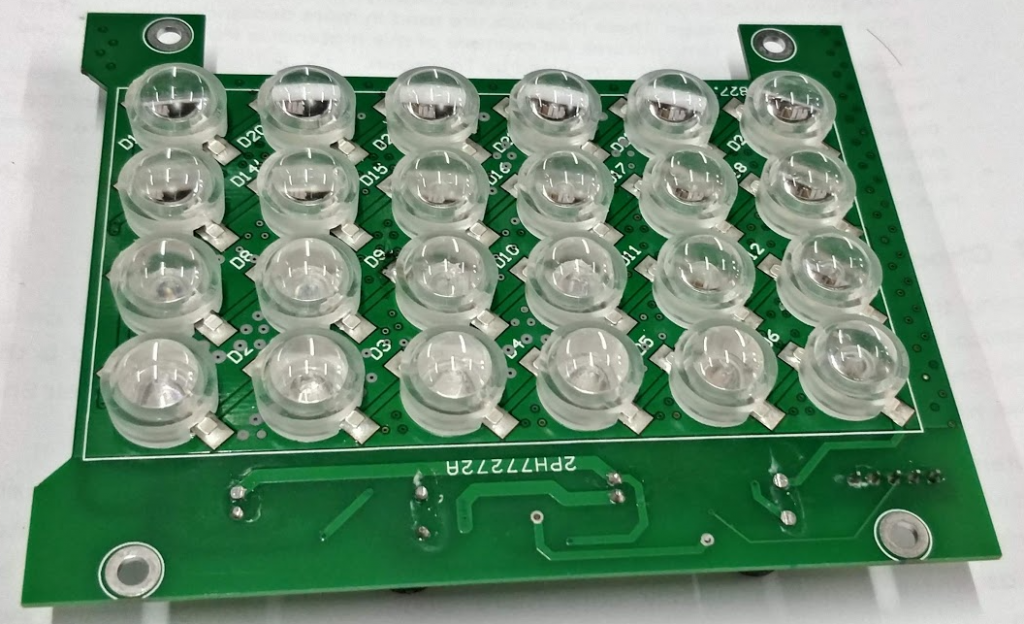
The UV panels were procured through Sparkmaker, originally designed to be backlights for their Sparkmaker boards. The initial idea to increase UV exposure was to have six UV panels – one on each side of the housing. However, along the way, we decided that having a set of UV panels at the back and the part rotating on a turntable made more sense. These UV panels emit UV light with wavelength 400 nm.
The Turntable
As for the turntable, this was taken from a Ciclop 3D Scanner that we had lying around, and repurposed specifically for this design. The turntable from this scanner alongside a motor and a potentiometer make up the majority of the moving parts of this Curing Chamber. The knob potentiometer is used to vary the turntable’s speed, allowing the user to adjust the speed as required, while the machine is on. A mirror was attached to the turntable to act as the main surface bed of the Curing Chamber. This allows a further reflection of the UV rays and a more thorough curing.

Cyclop 3D Scanner 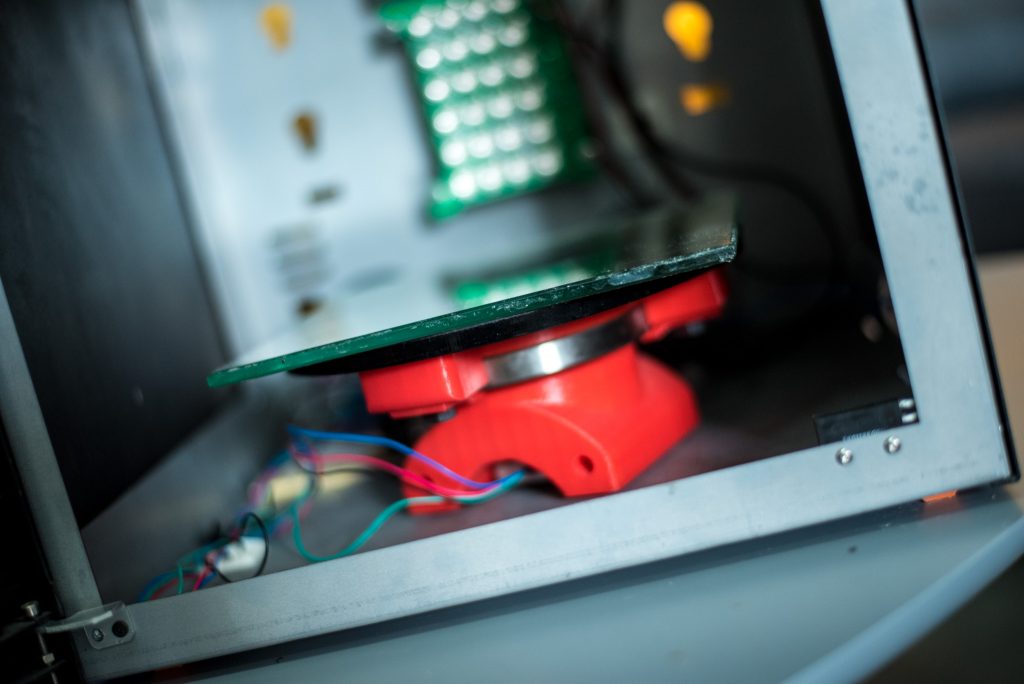
Cyclop Turntable in our Curing Chamber
Safety First!
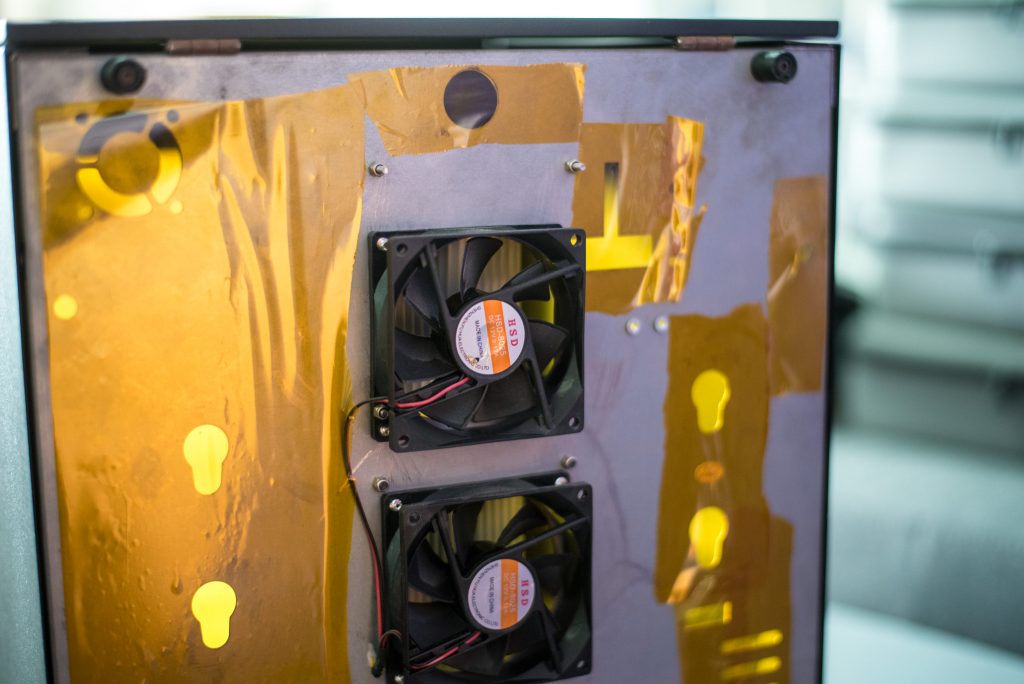
Since UV light is being used in this setup, a number of safety features had to be implemented into this Curing Chamber. Such features include installing old computer fans to the back of the housing, to ensure active cooling of the UV panels.
Another safety feature that was implemented was to cover the front glass in Kapton Tape. This is done to minimise as much as possible the amount of UV rays that escape the Curing Chamber. Kapton tape was also used to cover all holes and small gaps in the rest of the housing.
The last safety feature that was implemented was a magnetic switch that cuts off all power to the system when the front door is open. This is incredibly important so as to prevent anyone who opens the door while the UV panels are on from unnecessary exposure to the harmful UV rays.

Post Cured vs Green Part
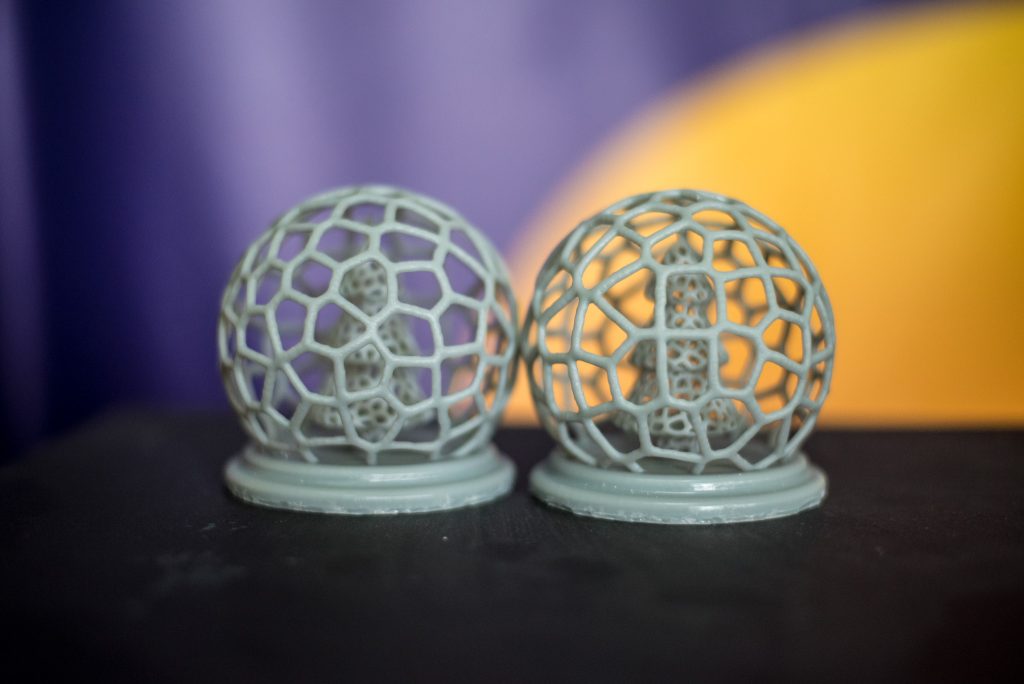
As can be seen in the image above, the main visible difference that one can see is that the post cured part is slightly duller, and has a darker shade to it. Upon closer inspection, it can also be seen that in the cured part, the layer lines are less prominent, and it looks smoother overall. The green part also looks slightly glossier and shiny, while the post cured part looks more matte.
Other than that, the green part is ‘softer’ and the voronoi pattern can easily be pressed in slightly, denting it. On the other hand, the cured part is stronger, and it is not easy to dent the voronoi pattern.
Some Tips for Curing resin prints.
When dealing with any 3D printing resin, it is important to wear gloves. This includes when you’re taking the finished part out of the printer, and when you’re cleaning it. Before post curing the parts, they must be washed appropriately, following the recommended manufacturer’s guidelines. This is often done with isopropyl alcohol. When it comes to the curing, it’s important that the resin part is fully cured by exposure to UV light. This should be done with respect to the manufacturer’s recommendations. These are all things that are taken into consideration when using our DIY UV curing chamber.
Stay tuned for our next blog post, which will be a continuation to our previous blog post about the HubCap project!